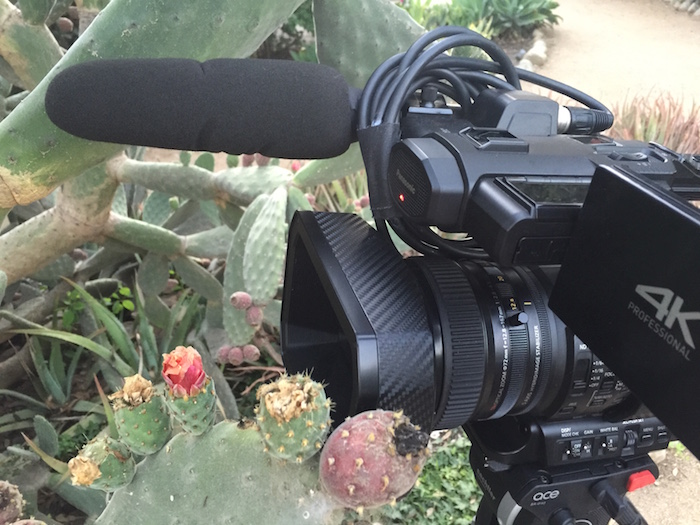
Unlike some production firms, we shoot so often that having our own gear in-house is essential. The evolution from HD to 4K is nearly complete in our studio, except for a run and gun 4K camera. To that end, we’re excited to be testing the DVX 200 camera from Panasonic. It will be released in the summer of 2015, and we’re looking forward to comparing this camera to our already remarkable D-SLR, the Panasonic G4.
OVERALL IMPRESSION
I won’t mince words. This is going to be a killer camera. There’s no doubt that once an operator learns all of the ins and outs, the amount of control, image capability, and flexibility relative to the integration of software, glass, and form factor will lend itself to gorgeous productions.
My only regret is not having two more days to learn how to use some of its capabilities and to fine tune it.
TESTING PROCESS
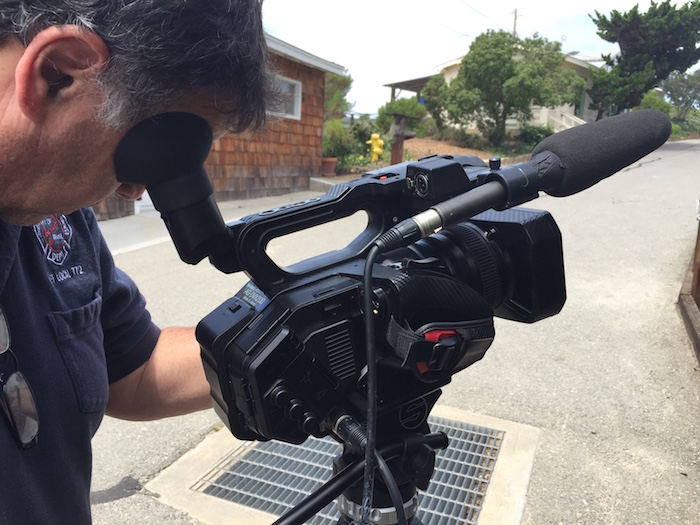
Our perspective was to test this as a tool for documentary work. We did not conduct portrait interviews, cinema style shots, or television production capture. Both Cameron and I used the camera as a run and gun documentary media capture device. The objective was to see what types of content we could grab using a minimal amount of gear. That meant limiting ourselves to the following:
- DVX-200 Camera
- Sachtler tripod
- Shotgun mic
Compared to using a DSLR, this is like being used to running in cowboy boots and suddenly switching to Nike runner’s shoes. Frankly, throughout the entire testing process, we were reminded of how much we’d forgotten about using this type of camera.
ISSUES TO CONSIDER:
Let’s start with the things that were not so great.
1. A very important function for documentary and cinema camera operators is the ability to run with the camera, with the camera facing to the back, and the camera viewfinder facing forward. To get the image properly, when the viewfinder is flipped over, the image should flip over. Currently, it doesn’t. This is a drawback for multiple types of uses and it would be terrific if in the future, this function could be implemented into the camera.
2. This may have been operator error (due to lack of time), but we could not determine how to select a preset “look” and to then see what had been programmed after the fact. We were able to find out how to create a preset, but not how to check the preset selected. This was important because there were already presets implemented, but outside of the cine alta icon showing, we weren’t able to determine what exactly had been created.
3. When you select a preset, it might be useful if there was a reminder that you were switching presets — just as you would when you are about to format an SD card. “Are you sure?” Typically, you won’t be switching presets on the fly, as that would be highly disruptive to the image being captured. And, at the same time, you don’t want to hit a user button and switch the preset, but MISS THAT YOU’VE DONE THAT because you’re focused on the content being captured.
4. Again, this is potentially operator error, but it would be nice if you could more easily measure the noise level, notably in blacks or primary colors. We shot some material (using a user preset) and it looked great in the viewfinder, but there was a lot of noise in the product when viewed on a monitor.
5. The focus ring spins. There are no hard stops. That’s not good for most types of work.
6. I tried a few shots by putting a piece of tape at the two points where I wanted to adjust focus, and the points did not line up. Put another way, in rehearsal (the first time used), things were fine. Try to use the same mechanical adjustment more than once and the points of reference shift. I’m sure that’s software, but it creates a liability for a camera operator. This is particulary true if working on a cinema style shoot, which we weren’t. We used the zoom controls while on the run, and in that instance, everything worked well.
7. It would be nice if the camera would link up and control an Atomos Shogun. That has got to be software.
THINGS WE LOVED:
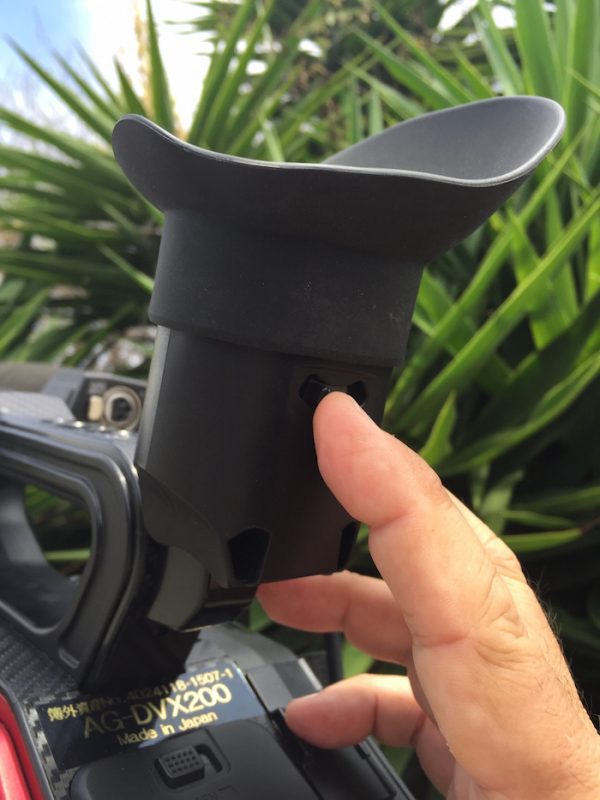
1. The viewfinder is fantastic. The diopter works very well, and the image within the viewfinder is sharp and very usable, regardless of external light levels. The different modes also work well. This is something totally missing from the DSLR world and should be actively promoted as a competitive advantage. People are spending more than $500 to try and achieve the same imager as is built into this camera. My eyesight and that of Cameron is different, but it literally takes just about 5 seconds to adjust the viewfinder and we’re seeing the exact same image.
2. The external flip-out display is also very good. It blows the external displays from others away. As you might expect, it’s affected by bright light, but I would note that you can still see an image in bright light. For detail, you may want a larger, high resolution external monitor, but for many applications, this works really well.
3. The lens is beyond what you would imagine getting on a camera at this price point. This is very nice glass. It isn’t a Zeiss prime PL lens. It’s not to be used the same way, either. I imagine some people will complain, but this is an Apple’s vs Orange’s issue. The macro capability is terrific.
4. The servo works really well. The zoom is very smooth, even when actuated just slightly – a very slow push or pull.
5. If you’re good with your eye and hand, you can rack focus without an issue. However, if you try to do this in a cinema style (measuring distance, focal length, etc.,) it won’t work. So, it’s important to position this as a freehand rack capability (until such time as the software issue is remedied, if at all). As we are good with freeform rack focus, we got some great stuff.
6. I really liked the weight of the camera. Cameron thought it was a bit heavy, but for me, the weight was ideal for long hand-held shots. And we have plenty of them. I would say we shot 70% of the time handheld.
7. The form factor of the camera is fantastic. Having one XLR input near the shotgun mount and another near the lower back off the camera is a great idea.
8. I loved that there is a power input. Being able to rig up an external battery would be very useful if you’re planning on shooting for several days in a row.
9. Managing depth of field with a fixed lens has been the death of other all in one cameras. Not so with the DVX-200. It really does a great job. See below.
STUFF WE SHOT:
On the afternoon of the first day, we captured some generic types of things, notably just learning how to use the camera.
We were delighted by the dynamic range, although in our initial tests, it didn’t seem to run 12 stops. In later tests (see below), it looks to be a true 12 stops.
We were also very pleased with the way the imager captured natural light and artificial light. Check out this frame grab to see just how natural the light is:

And, the macro was amazing. Here is an example of the positioning of the camera and the macro image captured:

We spent some time working with the focal length, iris, and ISO to come up with some interesting fairly shallow depth of field results. It’s very impressive. Take a look at this shot – roughly 5.6 at 70mm:

The camera is capable of capturing images in low light. There is an abundance of noise. In fact, overall, we found a fair amount of noise in the camera whenever there was some element being pushed (ISO, light, motion, etc.). This is not a deal breaker, but it does mean taking the time to learn everything you can about the camera, and we frankly didn’t have time to do that. So, we ran into some issues where after the fact — we say more noise than we expected, or wanted. The shot below was taken past dusk, and it’s holding up fairly well:

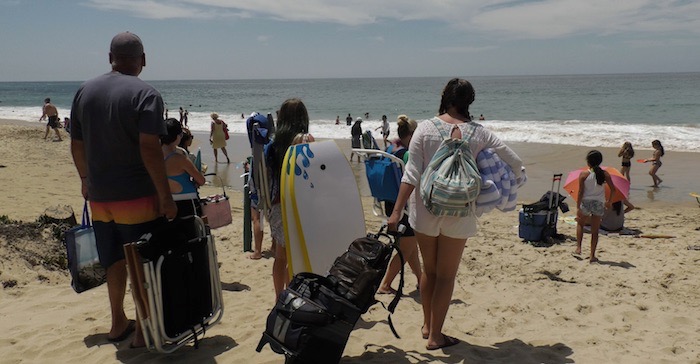
Day two was limited in time, but we did manage to get out and shoot a typical set of B-roll. By the shore types of images from Southern California. We experimented with the servo, more macro, and straight-ahead full color capture. We found the camera to be quite capable at grabbing images that were far away (300 yards or more), and in addition, we were able to test its motion capabilities, and they were very strong. A few images from the day:
This little boy was about 30 yards away when we captured images of him:
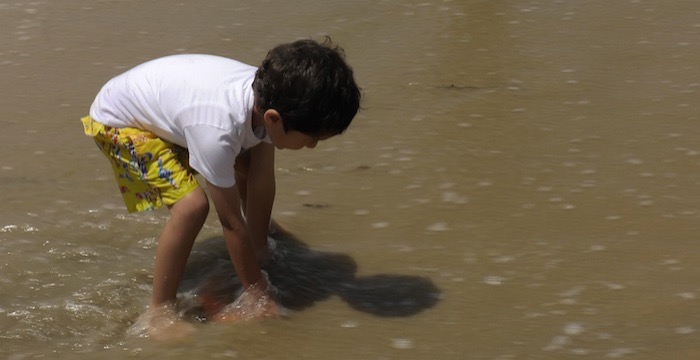
The detail in the shot is very good. Strong color, not too much noise (bright sunlight), and even the detail in his hair is really good.
This next shot is only about 8 – 10 yards away from the lens. So, there is good iris continuity as well:
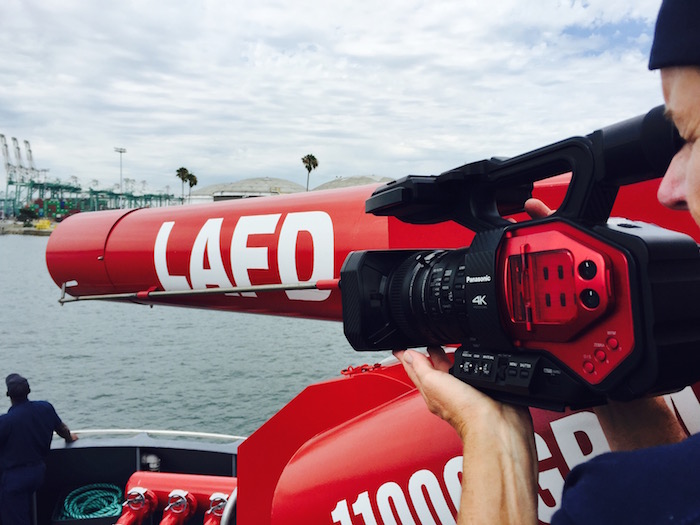
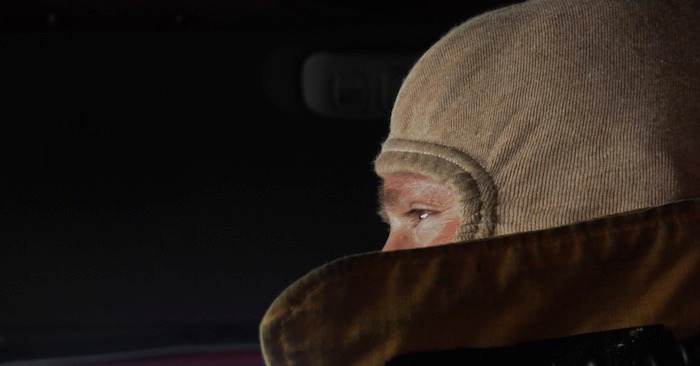
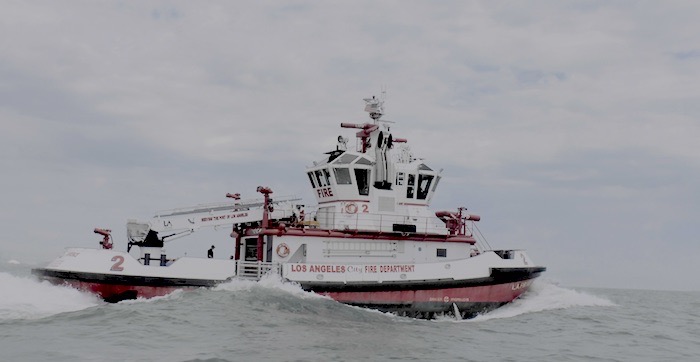
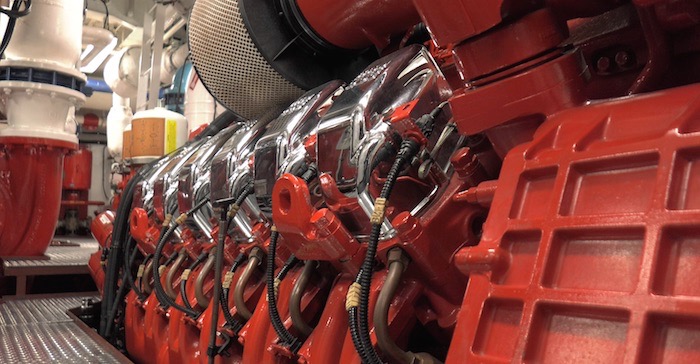
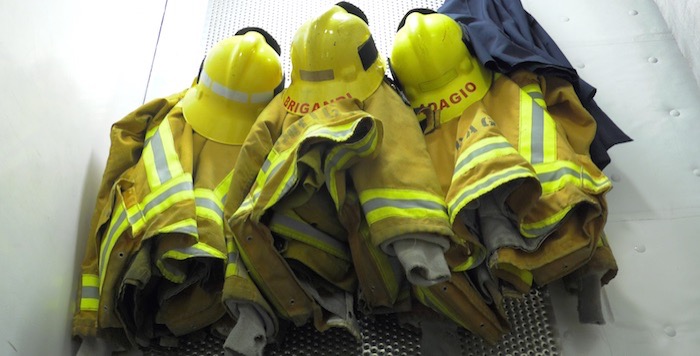
On the third day, we had the opportunity to work with the camera in a more documentary style environment. I had the camera with me while working with our partners in the Los Angeles Fire Department. You have to grab things as they occur. This was also another opportunity to test the dynamic range of the camera. Check out this wide dynamic range example:
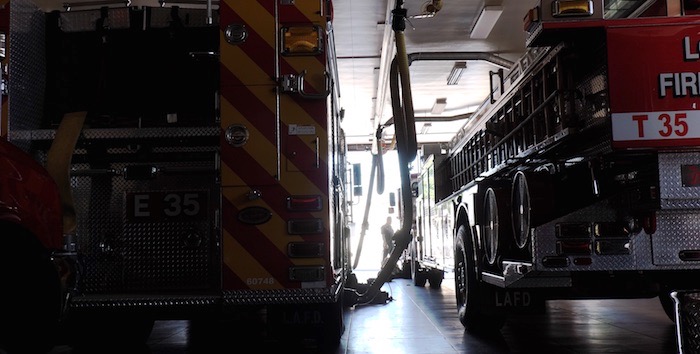
The detail in the darker areas is really strong – the rubber in the tires, etc. While the street is totally blown out, the ability to get the up close detail and the lenght of the apparatus is way beyond what some of the other cameras we’ve used recently can achieve.
The rest of the day was capturing activities as they occurred. The most notable issue is that we used the DVX-200 in a true run and gun environment. In many examples, the dynamic range was captured nicely – something some other cameras just won’t do with as much performance behind them.
Both of these examples show quite a range of light, and the detail and dynamic range are really terrific.
It’s dark in a fire truck and the time of day was 2PM, so the exterior light was more than 12 stops away from the interior. Still, the image isn’t totally blown out.

The final day allowed us to spend some time evaluating the modes of the camera and the various gamma adjustments. We didn’t get nearly enough time to work through these adjustments, but the day was a good test day — overcast. Everything was grey and white. No real contrast at all. So, we were able to evaluate some cinema style looks. They look really good, but they also have a lot of NOISE in the images. That may be operator error, but we’d need more time with the camera to really evaluate that.
The above two images are very film like… but there is also a lot of noise.
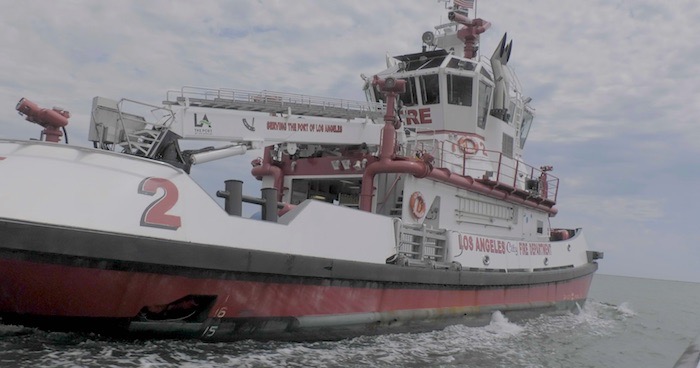
The same settings when used in the interior of the boat showed great detail.
As you can see, there are three totally different looks to the three images above. Note that we had some challenges knowing which preset setting was doing what – we could clearly see which we had selected, but not how they were defined (per my comments above). Overall, it was a very interesting day, notably on the water when there was almost non contrast between the sky and the white of the fire boat or small whitecaps in the water. A real challenge to get anything that was interesting – flat video is easy, but a powerful image is something else.
OVERALL RESULT:
Even though this is a pre-release camera, and there are clearly some issues to work out, it proved itself a capable performer. With a bit of adjustment and refinement, this could set the lower end of the pro market on its ear. It was a joy to use, carry and shoot with.
Would we own one?
Not only is the answer yes, but we’ve already received our unit from EVS in Burbank. Great support, great dealer, and a fantastic camera.
NOTE: Updates have further improved the camera. It’s really stellar for the price.